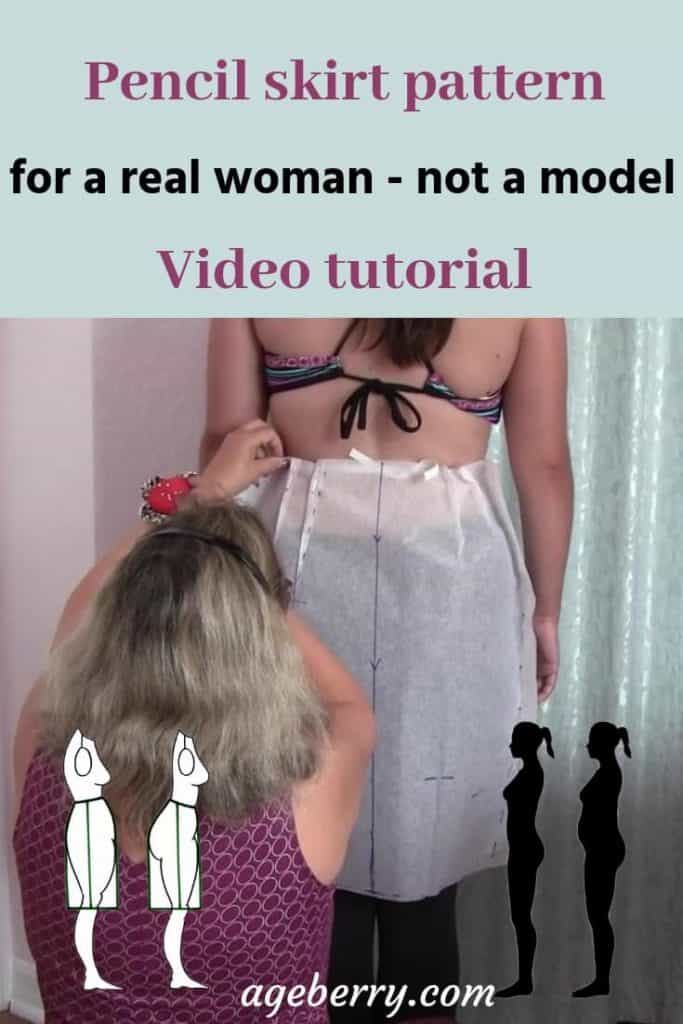
High Waisted Pencil Skirt Fashion Diy
If y'all want to learn how to sew together a pencil skirt with zipper, start with bones brim pattern drafting. In this tutorial I am going to testify you lot how to brand a pencil brim blueprint, what is a good fit for a pencil skirt, what plumbing fixtures problems you may accept with a DIY pencil skirt and why y'all may have them, how to take proper measurements for a pencil skirt and how to draft a pencil skirt pattern from scratch (for a real adult female – not a model).
I prefer to stitch skirts myself, especially since skirts are the easiest pieces to make for any shape! You can choose a skirt pattern that flatters your shape and makes it easier to achieve a comfy and flattering fit, like the 1 I nowadays in this article: DIY pencil brim. All you need is basic sewing skills, an understanding of material characteristics, and the right design.
If you similar sewing clothes, it'southward really important to have a good pencil brim sloper – custom-fitted, basic pattern which yous tin can redesign and create many different styles of skirts, likewise yous can use it to sew dresses.
In that location are a few ways to go this pencil skirt sloper for your ain measurements.
- You tin buy it (really cheap) from this company: Lecala sewing patterns . Hither is the link. You put your own measurements and you become your sloper in PDF. This of class does non guarantee the fit.
- You can draft your ain sloper on paper. This is relatively piece of cake to do and at that place are some tutorials on how to do it.
- Yous can utilise a draping method in creating your ain pencil brim pattern.
In this tutorial, I will describe the third way in particular. I believe this will give you the best result.
What is a good-fitting pencil skirt?
Pencil skirts should take a place in every woman's wardrobe because they are suitable for any situation and they never exit of fashion. The pencil skirt can have varying types of cut, fabric, fit, length, and hemline.
This tutorial is not about a shapeless sack with 2 seams, only nigh a classy, fashionable, flattering, chic, durable skirt that will exist a pleasure to wear for many years. Permit's see what we want:
- The skirt doesn't rotate on the figure
- It does not sag in the front and does non lift from behind
- The waistband tightly wraps around the waist and does not wrap itself in a tube
- The brim comes out from under the waistband smoothly, without tightening the figure. The drape of the textile should exist straight and polish and non too clingy but at the aforementioned time the curves of the skirt follow the curves of your torso and the skirt is non too amorphous
In other words, you should not need a belt to make the brim fit!
- There should be no puckering or pulling of the material anywhere. Y'all shouldn't have whatsoever horizontal lines pulling across the hip while you are standing
- The skirt should be snug enough effectually your waist to look sleek (you shouldn't exist able to get more than than 2 fingers betwixt your waist and the waistband of the skirt)
- The hemline should be always parallel to the flooring
A special annotation hither: this (hemline parallel to the floor) is peculiarly visible from a distance and will be part of the showtime impression on someone you meet for the first time. It can brand a LOT of a deviation!
- The slit does not disband in a relaxed state
- Yous tin really walk in the skirt ( tiny half-steps are not acceptable)
- The skirt drapes gracefully over your lap when y'all sit and does not bunch or ride up your thighs when you are walking
- The skirt camouflages whatsoever cruddy bulges that we all have
They say about this skirt: "Fits like a glove" and in that location is nothing to complain about. But is information technology even possible to accept such a skirt?
If you take a model figure (or pretty shut to it) yous may exist lucky to buy a perfect pencil brim or to make it yourself with a commercial pattern. But how many of us practise have a perfect body? So here comes a problem: why a generic pencil skirt blueprint doesn't fit most of us?
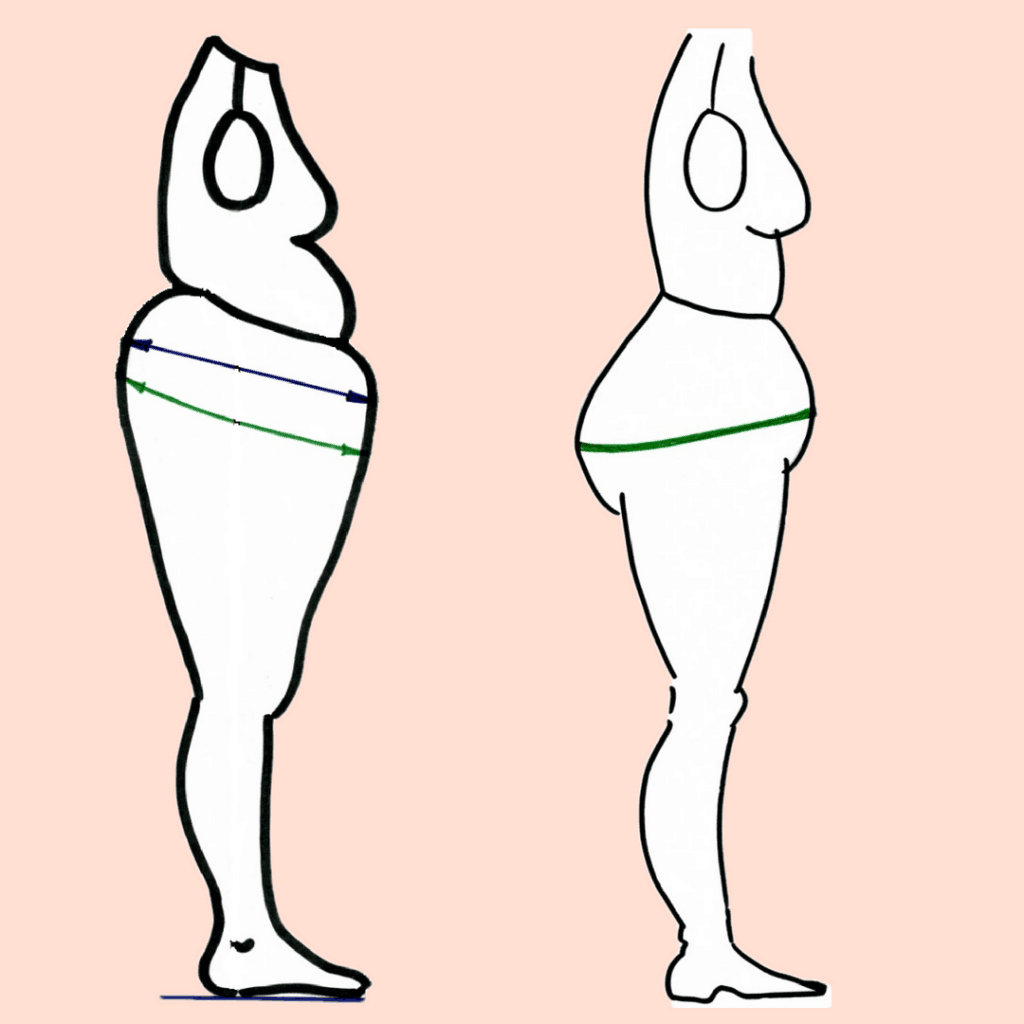
Because that pattern is not created for your unique body. Nosotros are all and then unlike from each other. Even if we have the same waist and hip measurements our figures tin can be completely different. Look at the drawings beneath.
Let's say that all these bodies have the aforementioned waist and hip circumstances. So, if we typhoon a pencil skirt blueprint using the aforementioned measurements – the pattern will be the same for all of them because it can't have all of those unique features into account … but the skirt will look differently on each of them.
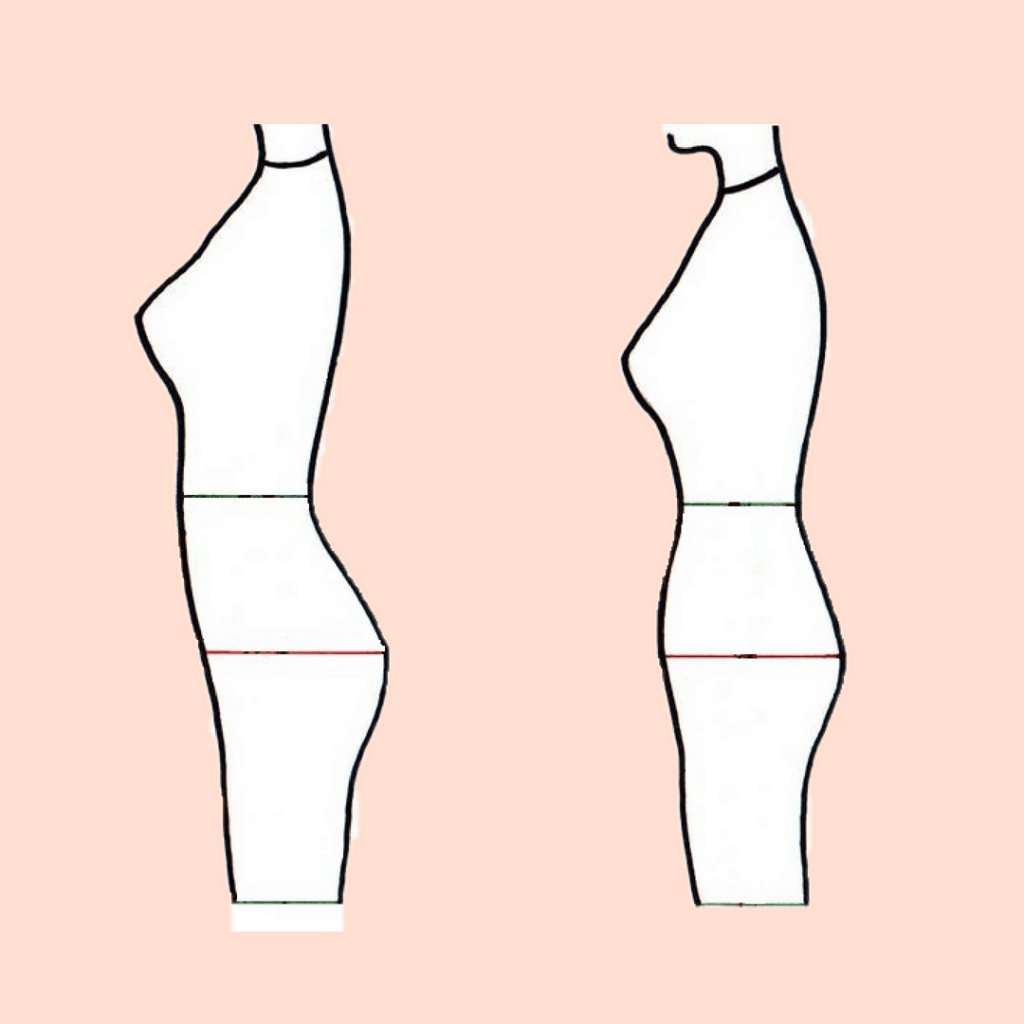
Also, many of the states have large tummies, or protruding buttocks, or steep hips, or the full general slope of the figure frontwards, etc. Denial does not serve any purpose here, better we recognize our body characteristics and work to prepare or de-emphasize undesirable facts.
Did you see my article "How to choose dress and patterns to requite the appearance of a flatter stomach"? It may exist useful to read, if yous have a specific body blazon.
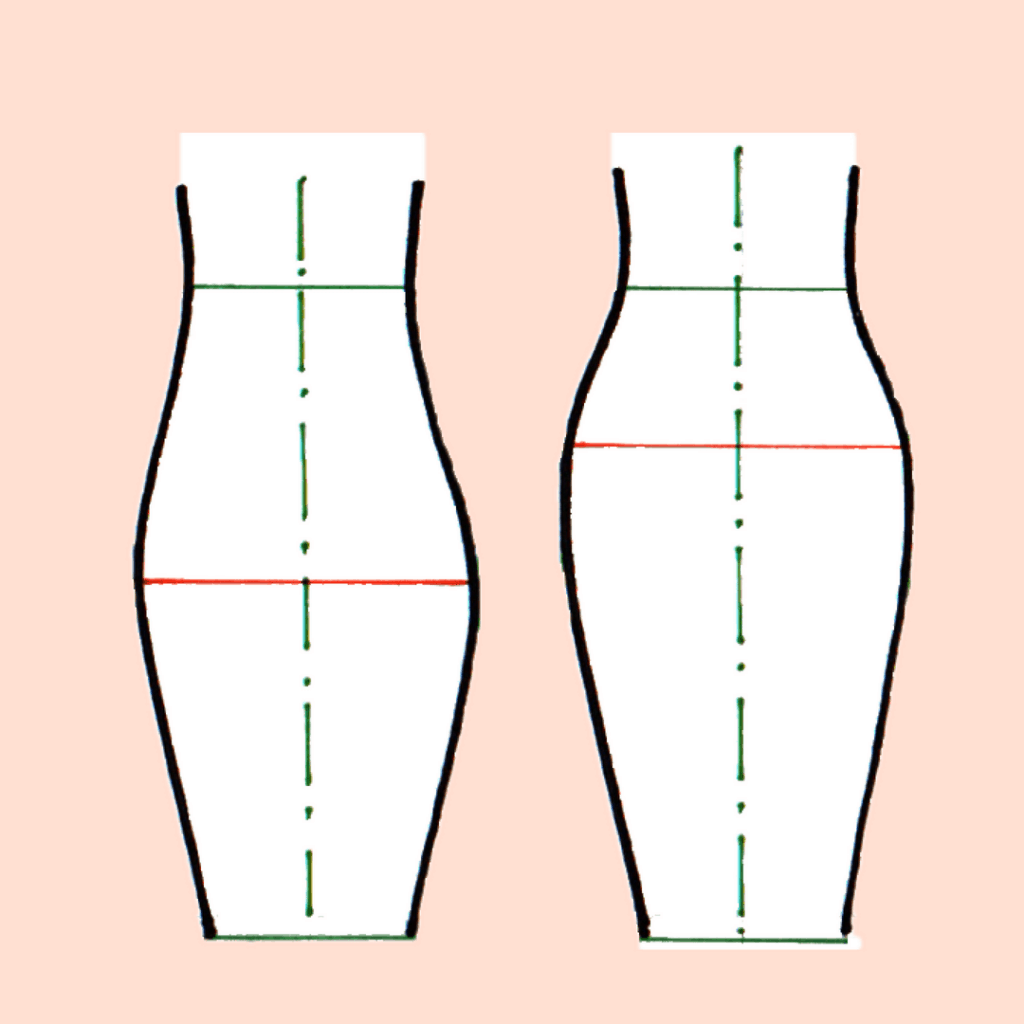
The position of the waistline can be different for different women. Nosotros used to think that the waistline is parallel to the floor. It's non always true: sometimes it's non parallel to the flooring. And if we don't have it into consideration while making our pencil brim sloper we may end upward with a brim that fits similar this. The hemline should be parallel to the floor, not the waistline.
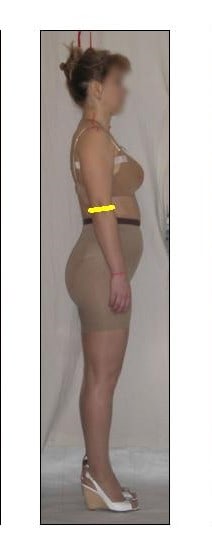
In the image here you tin see a side view of a "normal" body type. She is definitely not a model (skinny and with no curves) but has an average body type and a regular figure. Y'all tin can encounter that the waist line is pretty much parallel to the basis too. In that location is a high probability that for this trunk blazon you volition be able to find a fix-made pencil skirt in the store.
Just not all of us accept this torso type, or even if nosotros did accept it at some indicate, afterward one or more children and after a sure age, bodies alter.
Look at the images below. The question is – is it fifty-fifty possible to brand a pencil skirt that volition look good on the 2d effigy, that volition take a flattering fit for that woman?
I recollect it's very possible. We all can look beautiful with proper-made clothes. Wait at the images below. All of them are showing a plus size woman wearing flattering and well-fitting pencil skirts.
Brim measurements
Then, let'southward see now how to take measurements for making a pencil skirt blueprint.
We don't need to take many. Y'all tin take your own measurements for the skirt or ask somebody to assistance you. Don't article of clothing shirts, blouses, dresses, pants, skirts, etc. Information technology's better to take merely underwear for getting accurate numbers. I actually have a separate tutorial on taking body measurements for sewing (with a printable) if yous are interested.
one. Waist
Tie an elastic effectually your waist in the place where it's user-friendly for you. Ordinarily it's the narrowest part of your belly. Try to accurately make up one's mind your natural waistline. It may go horizontally parallel to the floor but even on a slender figure, it's not e'er truthful. A very useful hint: a brim will always clamber up to your natural waist so it is important to find your natural waist line.
I tin say that this is the most difficult measurement. Why? Considering whatever woman when taking this measurement draws in her belly! So endeavor to stand up upright and relaxed just don't prevarication to yourself: take your real waistline if you desire to breathe, eat, bend over and sit down downwards in your skirt.
If yous used to wearable skirts (and pants) below your natural waist, have your waist measurement anyway equally described above. This is necessary for a correct sloper and you can redesign your skirt waistline later.
ii. Hips
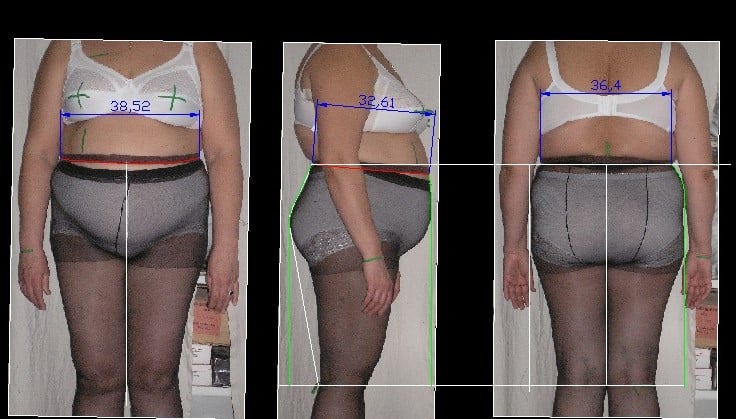
Usually information technology'due south recommended to measure horizontally the widest part of your hips. But again it'due south quite rare that the widest part of our bottoms goes parallel to the floor. Your tummy tin can protrude in different place than your buttocks. So we tin measure like this in the drawings beneath.
But there is another method, more accurate.
Have a rectangular piece of rigid plenty newspaper and wrap it over your lesser. Connect the edges with a scotch record and make sure they get exactly vertical and parallel to each other. And after that take a measuring tape and measure your hips. Be careful not to crease the paper in the process.
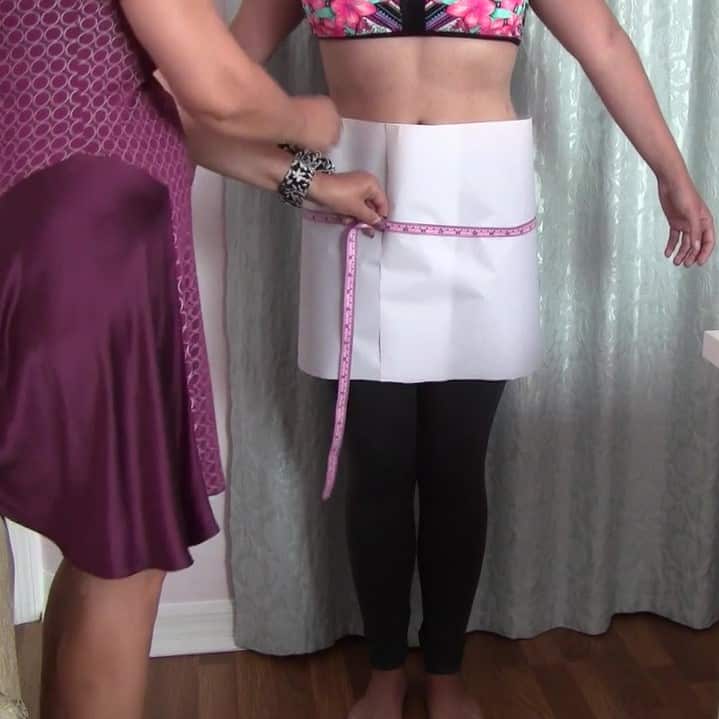
Similar in the video below.
Note that the newspaper draped around the body is pretty much a cylinder and then now we tin can take the measurement anywhere on the cylinder. Or we could mark the identify where it overlaps, unwrap the paper and measure it flat on the tabular array. This will not tell you where your hip line is EXACTLY, but will give you a relatively accurate measurement of the size.
3. Waist-hip bridge
Mensurate the vertical distance betwixt your waist ( where nosotros have an elastic, remember?) and the hips.
four. Length of the skirt
Measure the desired length of the skirt.
If you have a model body with long legs, and so you tin can brand a mini pencil skirt. But for a regular body, the all-time length is midi – just a lilliputian below the knee. Longer pencil skirts by and large require high heels.
Very important note: if your waistline is non parallel to the flooring your brim length will exist different in the front and in the back. Wait at the drawing below which I borrowed from another site, it shows very well the departure.
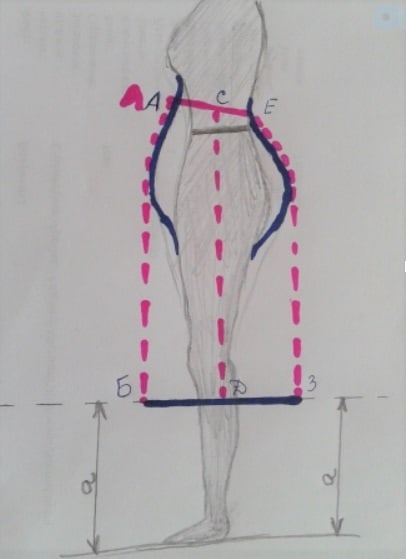
You take to remember that we placed an rubberband around the waist which indicates the place of the Real position of the belt of the future skirt.
Now yous need to measure the altitude from the rubberband to the floor from points A, C, E – on the stomach, forth the side seams and your back. So, take away from these measurements the distance from the flooring to the desired hem edge of the skirt (in the cartoon this altitude is a). And at present you will have your measurements for the length of your skirt in the front, in the dorsum and at the side.
Now yous can draft your ain sloper every bit recommended in this tutorial, for example.
How to make a pencil skirt pattern using the draping method
Just I would similar to show yous how I make a well-fitting unproblematic pencil skirt sloper pattern.
I am using the draping method. You tin't do it on your ain body and yous will need somebody to help you lot.
It took me simply 15 minutes to make a sloper but I wasn't really very careful and precise because my daughter was in a hurry and I merely wanted to make a point and demonstrate the method. It only seems that it's so simple, simply if you don't have plenty sewing experience yet, it is better to practise every step slowly checking twice if y'all are doing it right. So take your time and don't be in a hurry, and then your results will be better.
Note: Some of the links on this page are affiliate links. This means I will receive a commission if yous social club a product through ane of my links. I only recommend products I believe in and utilise myself.
For making a custom pencil skirt pattern you will need a nonwoven tracing material. I used with very good results the Pellon 830 Easy – Pattern 45″ x 10 yd

![]()
Information technology's lightweight just stiff and house non-fusible, nonwoven interfacing that is designed for apply in pattern drafting and tracing. It is perfect for altering, duplicating, and tracing patterns. It is also inkjet printer safe, making it ideal for printing pattern pieces for extended use. It too doesn't stretch which is important for making the pattern.
I also take used this equally a muslin for checking the fit.
For drawing, I used just a regular pen and a marker.
Step ane.
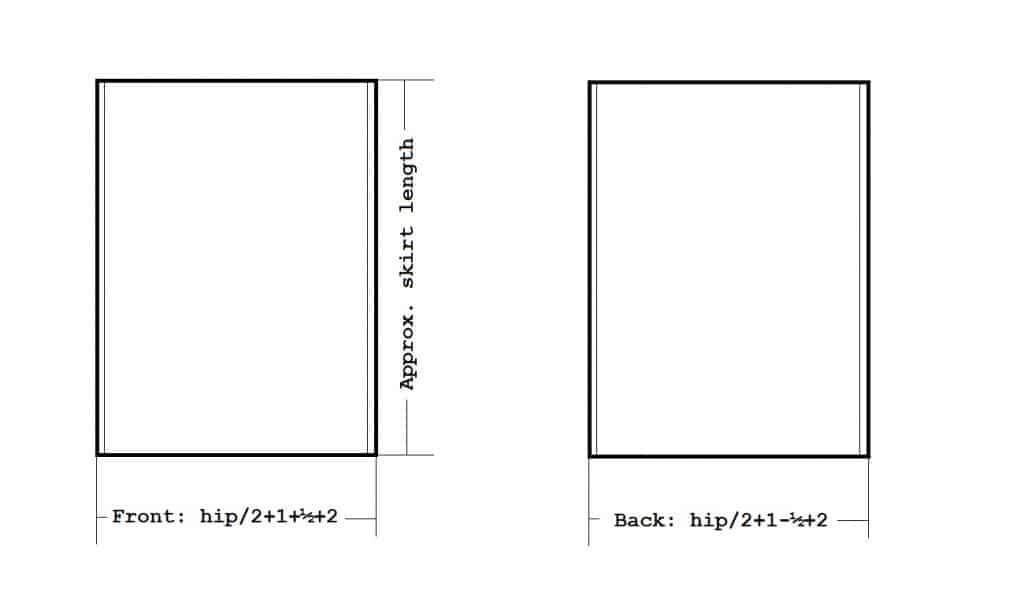
We need to draw 2 rectangles on that material. They will exist our design framework. Ane rectangle is for the forepart of the skirt and another one is for the back of the skirt. But before that, nosotros volition have to calculate the proper size for them. How to practice it? Very piece of cake.
Note: in the steps below I am using just inches for ease of agreement. For someone used to the metric organization, I recommend employ a computer similar my "Fabric calculator" or but employ a record measure out marked in both inches and centimeters. I use one like the ane below marked on the same side in both units. A x-pack will last yous probably x years! Merely of grade you can buy individual tapes too.

![]()
Divide your hip measurement in half and add ane inch to this number.
hip/2 + 1
Here I have to say why nosotros demand to add together 1 inch though. This is for wearing ease because the finished skirt has to exist a fiddling larger than your actual measurements for comfy wearing. In that location always should exist a small gap between the trunk and the material, otherwise, the skirt volition be too tight.
I volition employ my girl every bit a model for making the pencil brim blueprint. Her hip measurement is 39 inches.
So the first number will be 39/2 + one = 20 ½ inches.
But now comes some tricky moment. I don't like my pencil brim sloper to be equal at the front and the dorsum. I e'er make the forepart a little fleck wider than the back. So for the front, I add together ½ inch and from the back, I subtract ½ inch.
20 ½ + ½ = 21 in for the front
20 ½ – ½ = 20 in for the dorsum.
Now we accept to add together seam allowances to these numbers. I want my seam allowances to exist 1 inch. So I add 1 inch on each side of the rectangles. For my skirt, the numbers volition exist 22 inches for the dorsum and 23 inches for the front.
In the end, my rectangles for the brim volition have these measurements:
(hip/2 + 1) + ½ + 2 inches for the front
(hip/ii + one) – ½ + 2 inches for the back
And the length of these 2 rectangles should exist gauge length of your skirt. I made mine 24 inches.
Stride 2.
Cut these rectangles from the blueprint fabric. Make certain y'all cutting direct, keeping four 90 degrees angles. Draw visible lines for the centre front end and center dorsum. To avoid confusion, mark all necessary lines with a marking.
Footstep 3.
Pin these rectangles together at the sides. These volition be our side seams. Leave some altitude to put it on the model. The video beneath exemplifies.
Step 4.
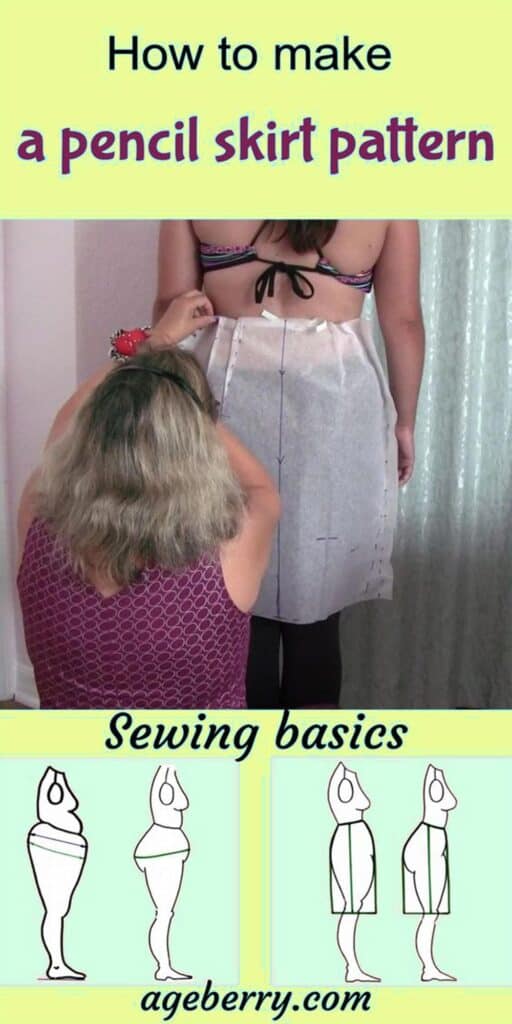
I used my daughter as a model to demonstrate this method. Check the video below. Yous can notice the complete description of the procedure after the video.
I tied an elastic around her waist so we can see clearly where her natural waistline is.
Make sure the center back line is adjustment with the spine and the center front line is aligning with the omphalus which is exactly in the heart.
Remember that the hemline should be always parallel to the floor.
As you tin run across the brim already fits the body at the hip line and below which shows our hips measurement was correct.
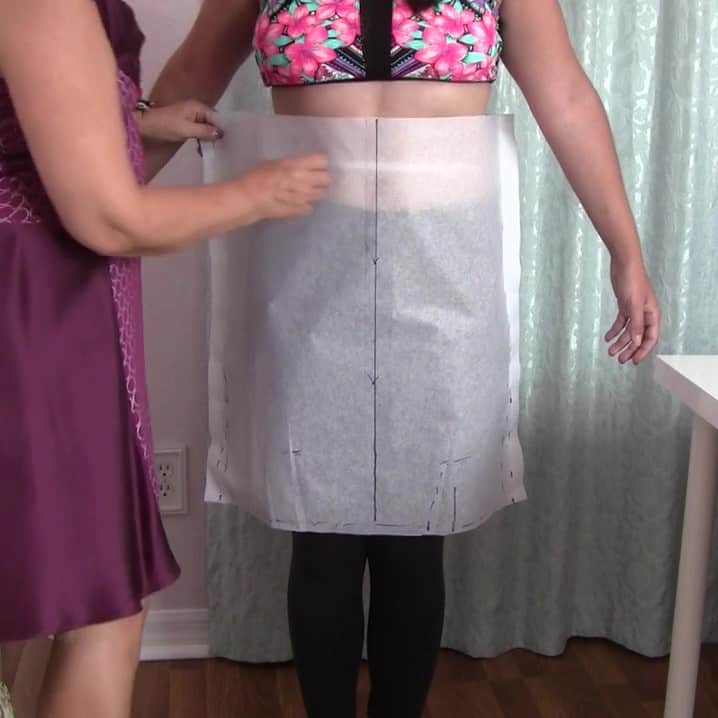
But it'south gaping a lot around the waist and nosotros will take to alter information technology now.
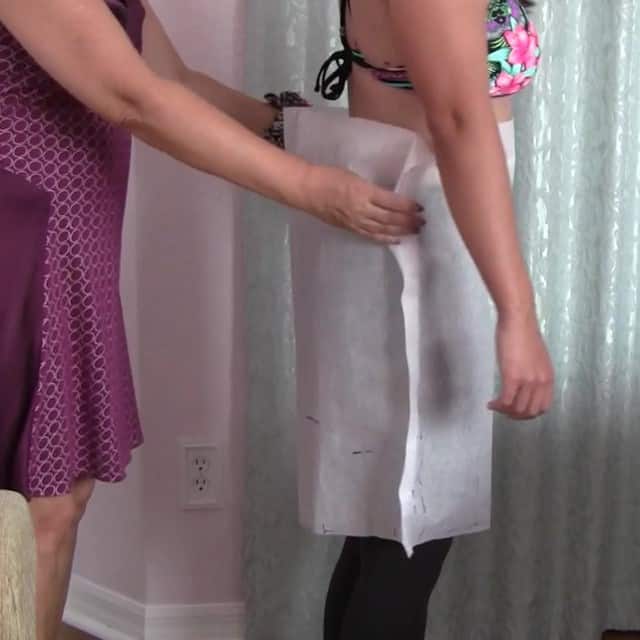
Let's start with the side seams. I slice the backlog off the side seams, take in one inch on each side and brand a new side seam line. Information technology'due south very important to proceed this line exactly vertical – otherwise, the balance of the skirt will be compromised.
The adjacent very important stride is to place darts. You can actually place them forth the waistline wherever you like or consider advisable. On my model, we can run into that the difference between her waist and the hips is quite significant in the dorsum. And then I brand two darts on each side of the skirt dorsum. But your body will be different (each of united states of america is unique) so consider this: if yous will take to accept upward of more than ¾ inch carve up it into two narrower darts. If it's less than ¾ inch make just one dart on each side of the skirt dorsum.
I try to make the darts closer to the side seams and non closer to the center back. It seems to me this way the skirt fit will exist better.
As well, usually I see that they advise making sprint's middle line go exactly perpendicular to the waistline. Well, I place the darts with a slight angle so the darts' points go slightly toward the side seams – to me they fit better this fashion.
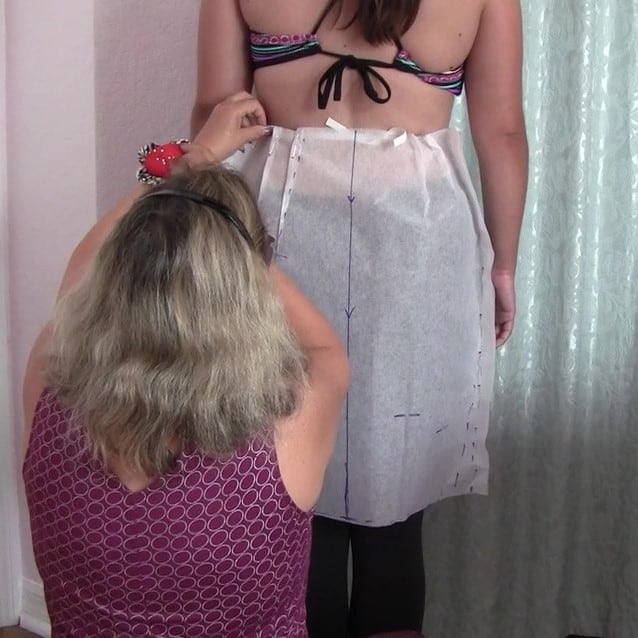
The next step is to make the front darts the same fashion. On my model, I see that in the front the darts will be much smaller in size. Don't forget to keep the centre line of the skirt in the proper identify.
Mark all the darts and side seams with a marker.
I run across the model body is symmetrical so I need to make everything perfect only on one side. I am not going to bank check the other side again considering I will use simply half of this template for making my sloper.
If you run across that your body is non symmetrical (which is actually happening quite frequently) then you can piece of work on both sides and try to make the perfect fit on both sides.
Now I will have to draw a waistline for the skirt. I can run into the elastic around her waist through the tracing textile so I will draw the waistline exactly like this. Once more, brand sure the skirt hemline didn't move and is parallel to the floor and side seams are exactly vertical.
As I said before, I was a little fleck in a hurry doing this pattern. But I propose you lot to be more than accurate and patient with this material manipulation and further refine darts, their length and angles. It seems so unproblematic to create a design like this. Well, it IS simple if y'all know what you are doing, when I did it myself the get-go time it did non seem that unproblematic! I tried to explain all the necessary points and if you follow my teaching yous should succeed. But information technology's really easy to make a mistake.
Step 5.
Now y'all will accept to transfer the brim template to the table and draw all necessary lines using a ruler.
Here it's really important to check for all darts if both sides are equal and if they have a slight deviation you take to change that and make them both equal.
Brand a smooth curved line where we marked the waistline. The short video below shows the process.
As well, for a pencil skirt, we may need to taper the side seams. Don't taper too much, ½ – i inch on each side seam at the hem level is normally plenty. A larger amount tin brand it difficult to walk in the skirt. Slight tapering at the hem works with the natural curves of the body and makes curvy hips look more proportional. Try to experiment and observe out what works the best for y'all and gives the most flattering await.
Make your seam allowances – the regular number is ⅝ inch.
Ok, you have created a simple pencil skirt pattern exactly to your torso curves.
Now yous volition have to bank check the fit and brand a test skirt to tweak the fit.
I made mine (nonetheless my daughter in the images) and I can run into that even if I was in a hurry to make the pattern the skirt fits really well. Maybe I will demand to alter the waistline in the back though. I guess nosotros all are used to article of clothing jeans that are higher in the back.
Do you brand these 15 mistakes with your serger?
Enter your email in the box below to download your free eBook and find out which mistakes you should avoid!
Subscribe to my weekly newsletters with sewing tips and tutorials, free sewing patterns, printable PDFs and other useful content and y'all'll find the eBook in your inbox.
Subscriber exclusive offering.
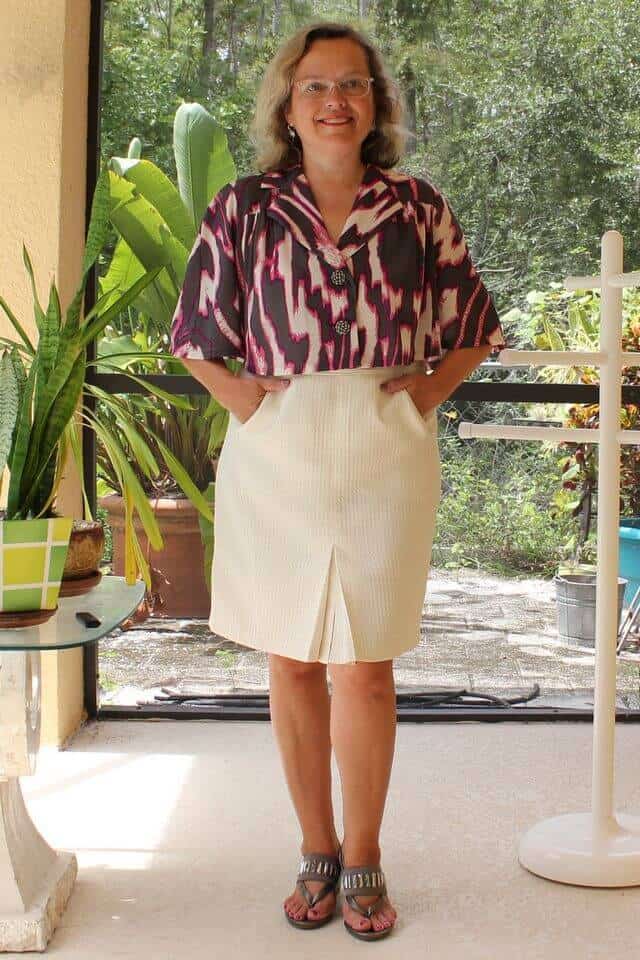
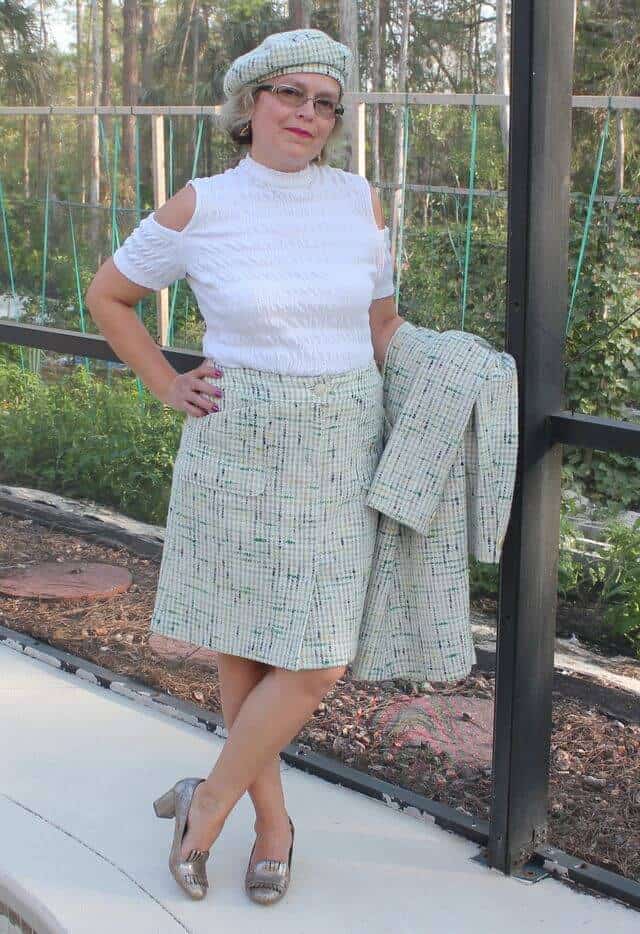
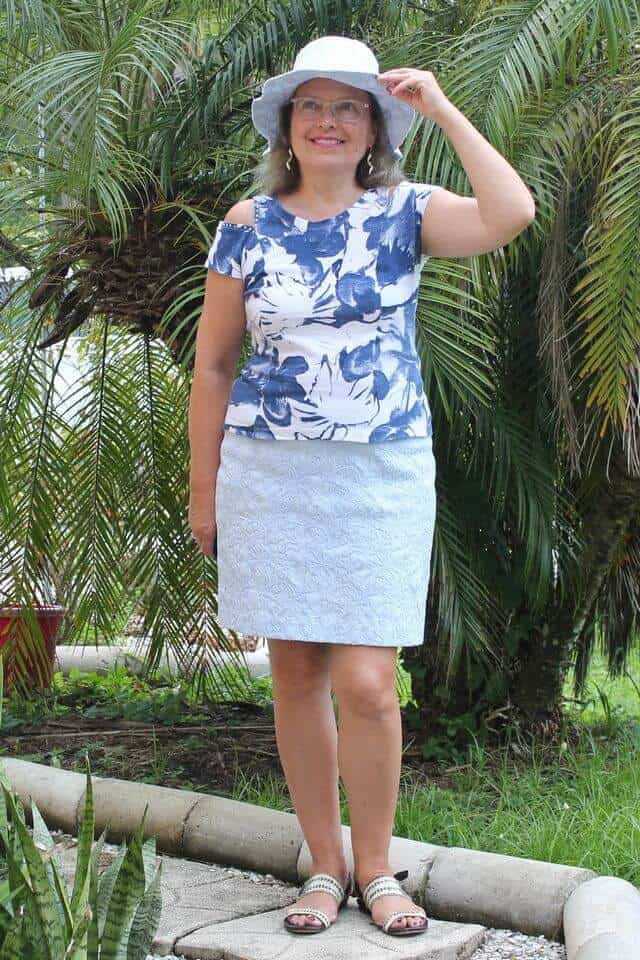
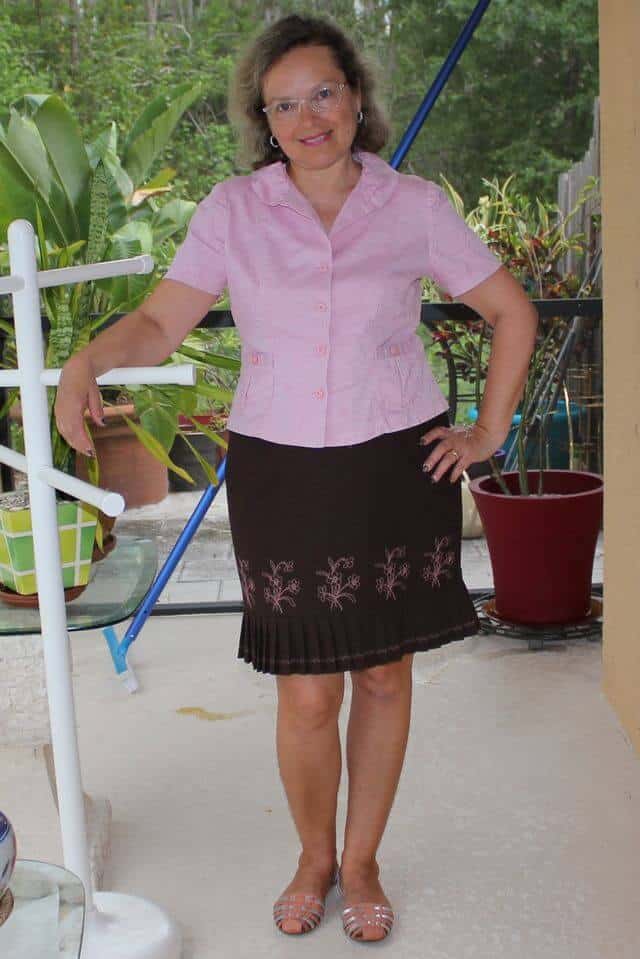
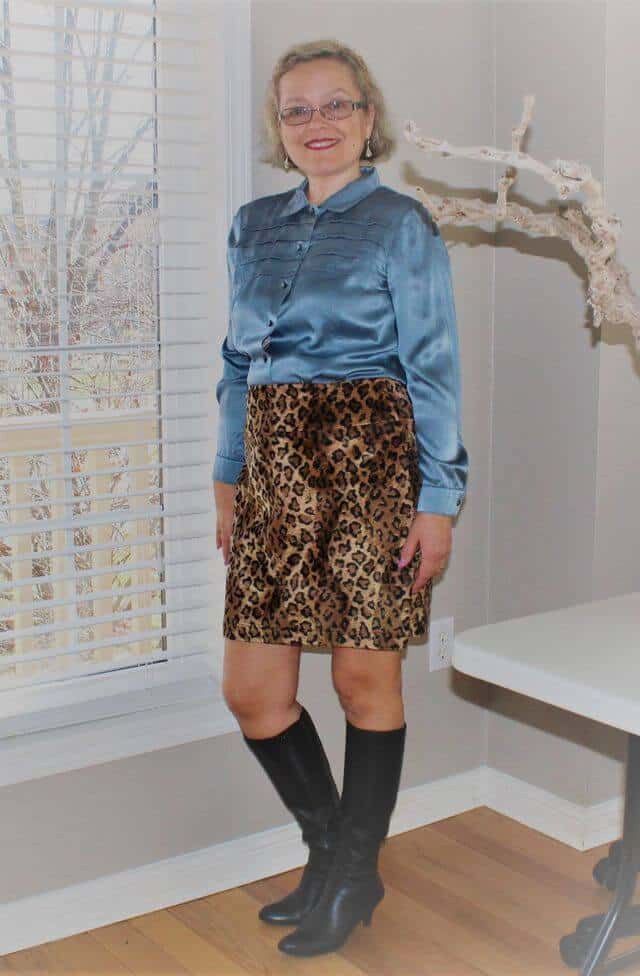
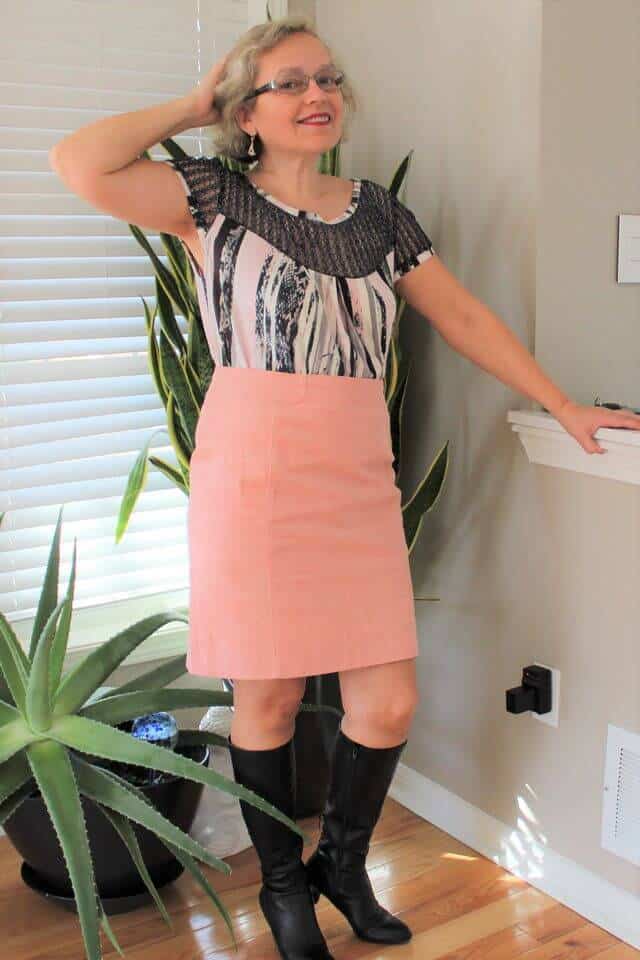
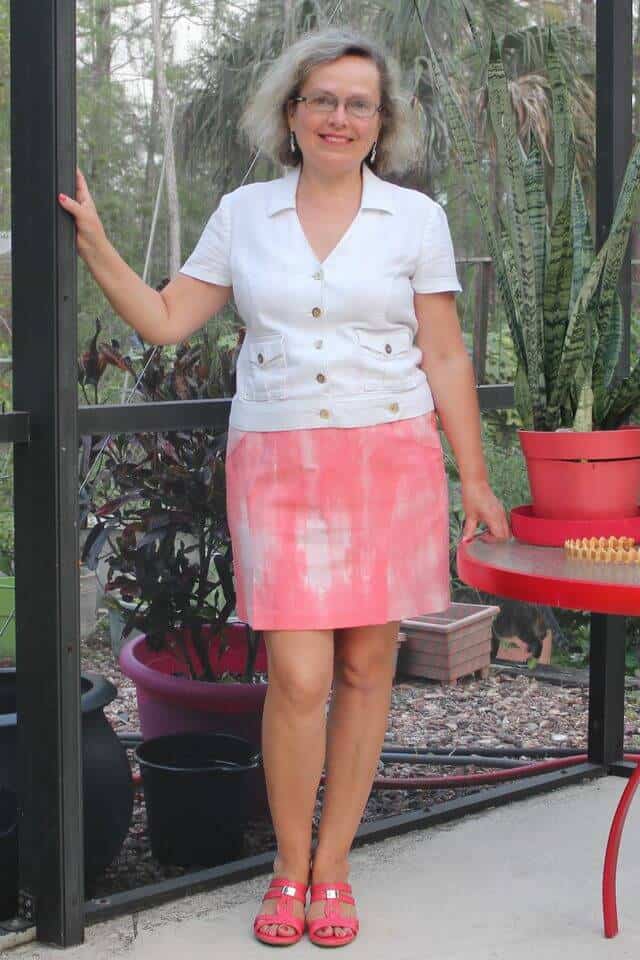
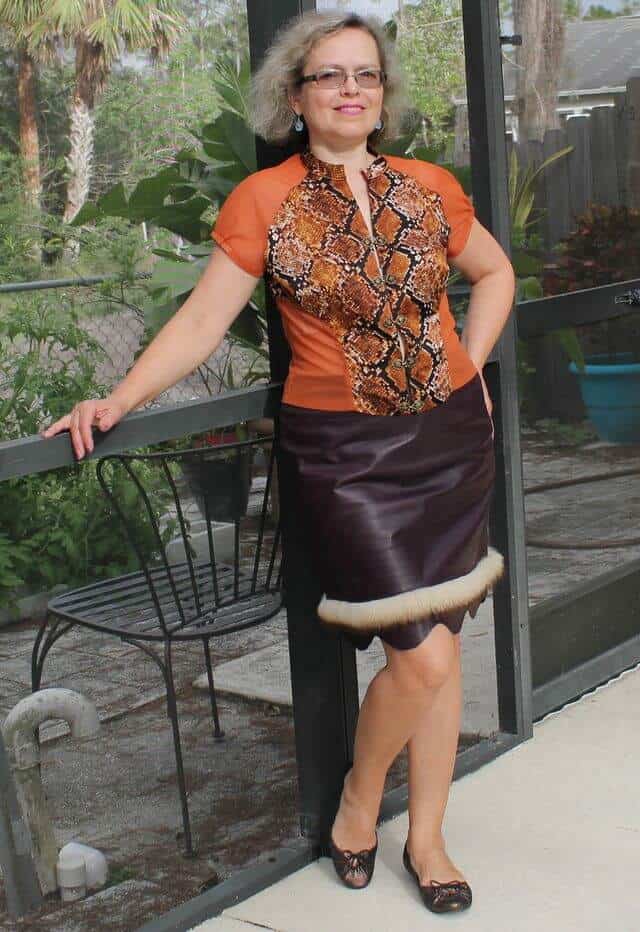
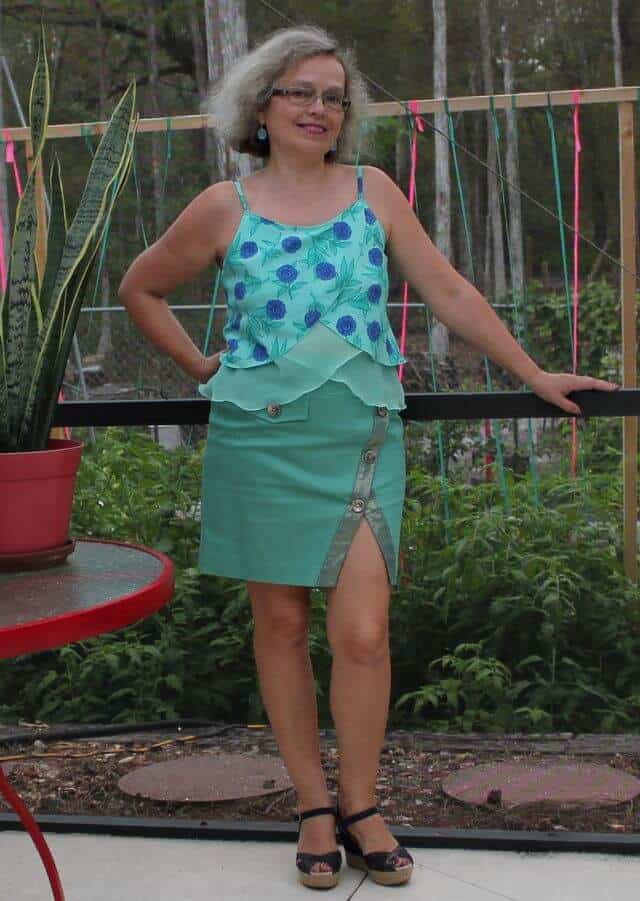
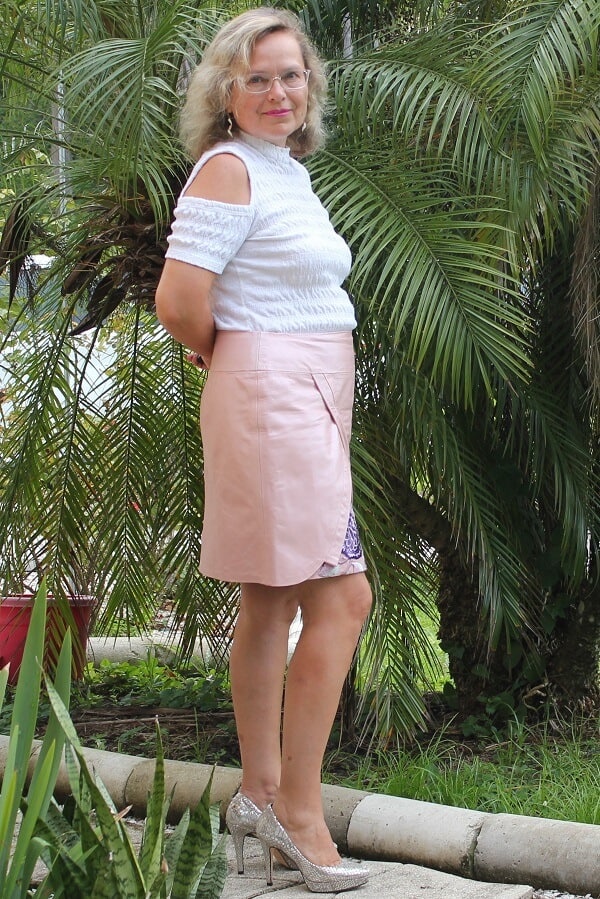
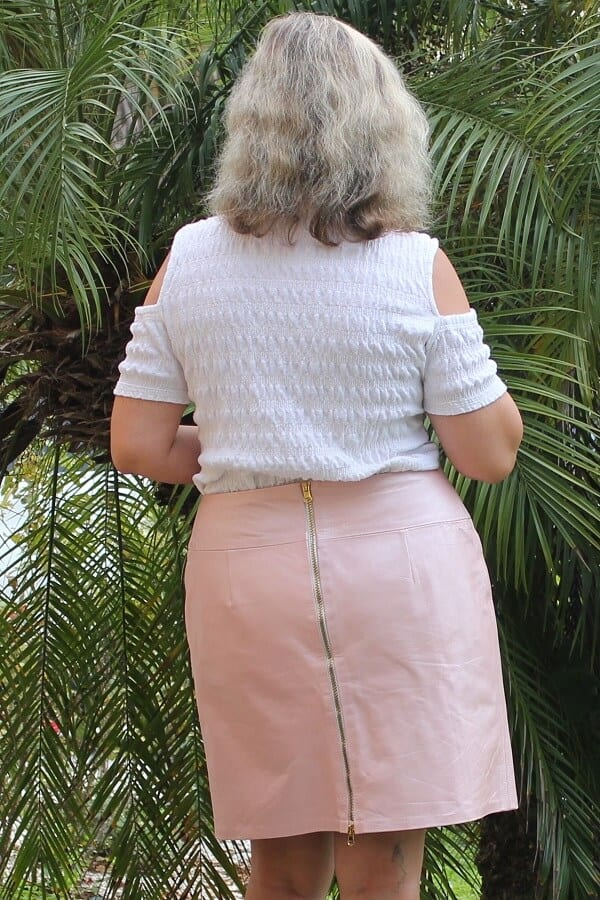
I made a pencil skirt sloper for myself many years ago and I am always using it equally a base of operations to draft different style skirts. Below yous tin can meet some skirts I fabricated in the last years using my sloper.

If you adopt a video tutorial on this bank check out my YouTube video here (~21 minutes).
Did you notice this tutorial helpful? If then, salve this pivot (see below) on your sewing board for future reference so you can come to it when you are set up to run up the skirt. Follow me on Pinterest for more tips, tutorials, and inspiration!


0 Response to "High Waisted Pencil Skirt Fashion Diy"
Post a Comment